Authorize.net ACH Configuration
Generating a new Signature Key
Authorize.Net announced that they are upgrading a security feature currently used in the Gravity Integration. The MD5-Hash used for transaction response verification is being replaced by a SHA-512 utilizing a Signature Key. In order to continue using the Gravity integration with Authorize.Net, you must make this update using the following workflow. To generate your Signature Key:
- Log into the Merchant Interface at https://account.authorize.net.
- Click Account from the main toolbar.
- Click Settings in the main left-side menu.
- Click API Credentials & Keys.
- Select New Signature Key.
- Click Submit to continue.
- Request and enter PIN for verification.
Your new Signature Key is displayed. To enter your Signature Key into your Gravity account:
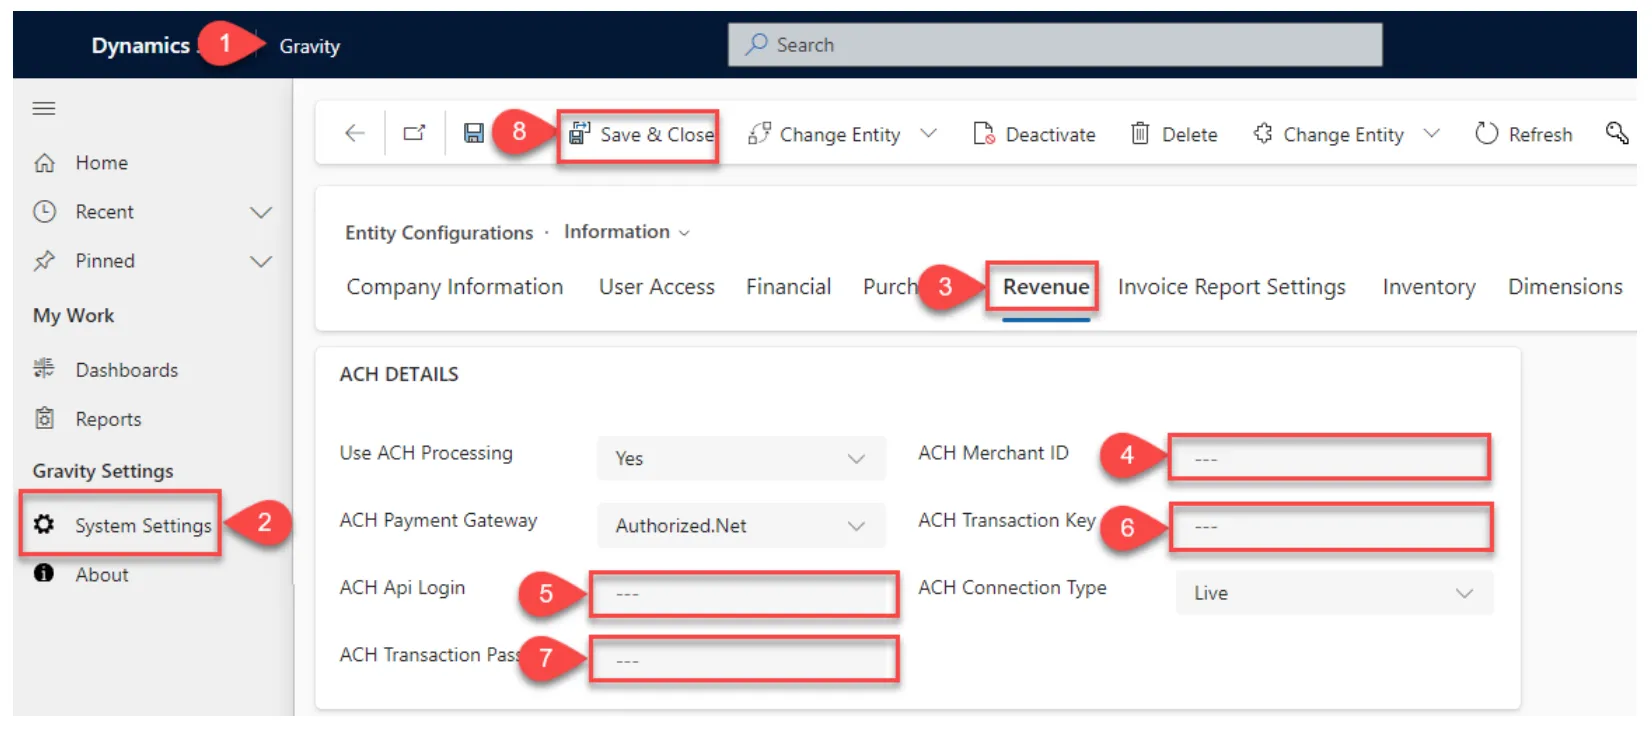
- Log in to your Gravity portal at your unique URL.
- Click System Settings > System >Entity Configuration
- Click on the Revenue tab and scroll down to ACH DETAILS.
- Enter your new Signature Key in the ACH Merchant ID field.
- Navigate to Account > Security Settings > API Credentials & Keys in your Authorize.net portal. Copy and paste your API Login ID in the ACH Api Login field.
- ACH Transaction Key
- If you have an existing Authorize.net account: Navigate to Account > Security Settings > API Credentials & Keys in your Authorize.net portal. Copy and paste the transaction key in the ACH Transaction Key field.
- If you have a new Authorize.net account: Navigate to Account > Security Settings > API Credentials & Keys in your Authorize.net portal. Enter a value for the transaction key. Copy and paste the transaction key in the ACH Transaction Key field.
- In the ACH Trasnaction Password paste the ACG Transaction Key (Same as #6)