Vendors
Use vendor entry to create or edit vendors.
Access the vendors function from the financials, expense options.
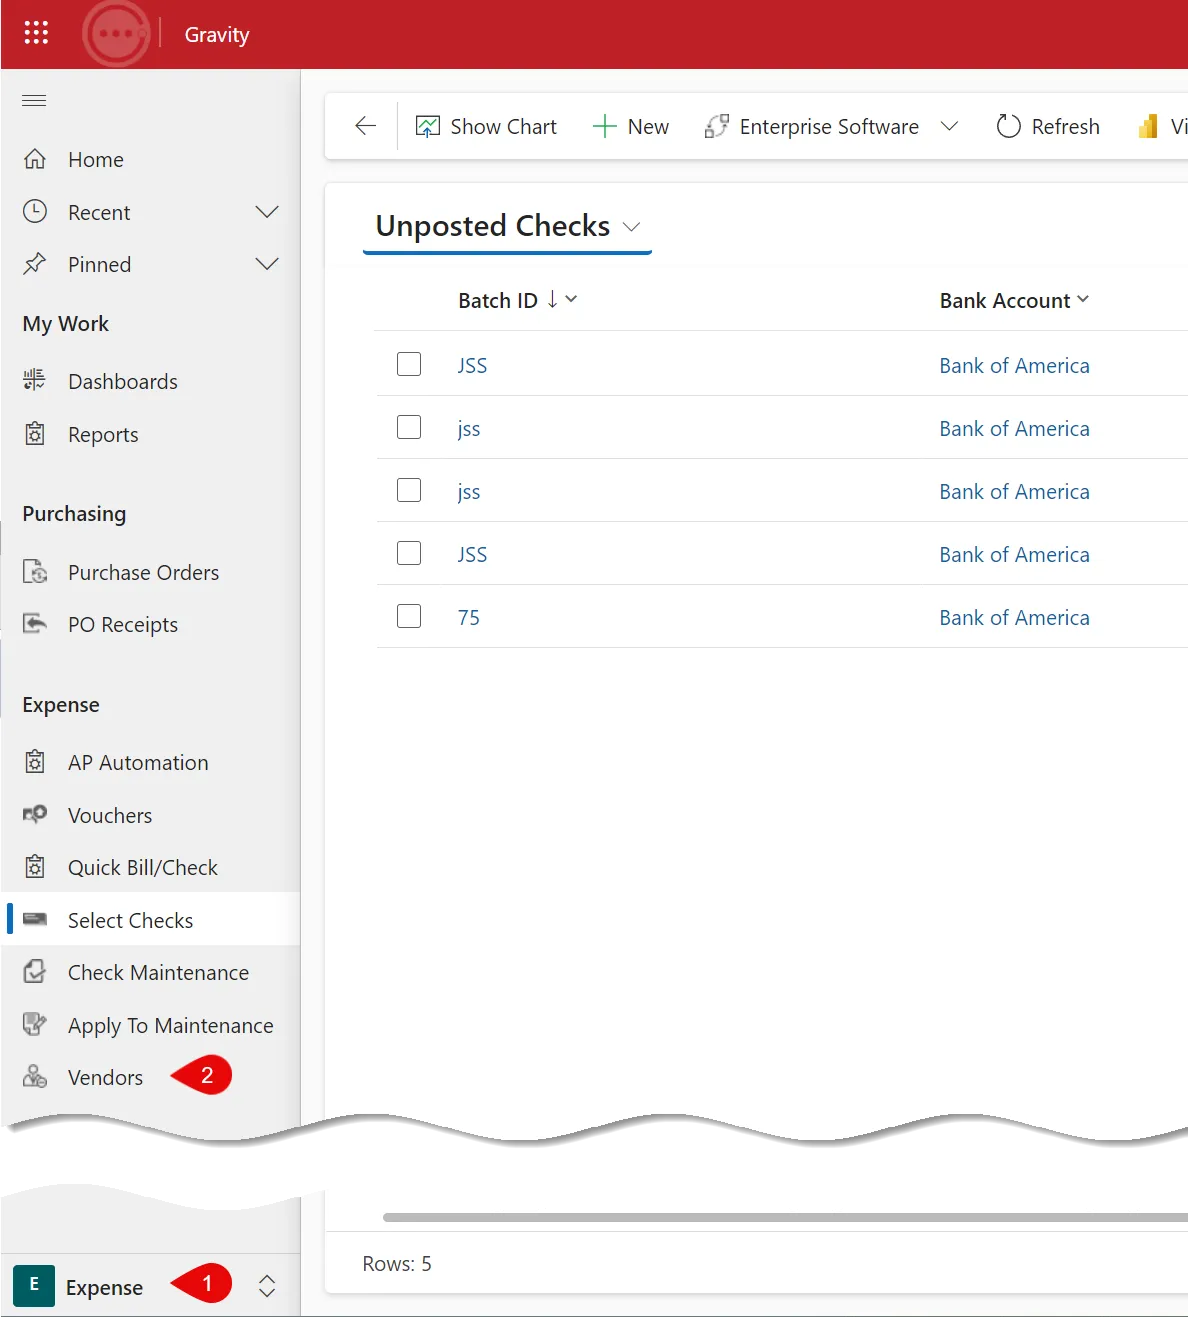
Clicking on the vendors option opens the active vendors screen. Use the screen to view a list of all active vendors.
Process Steps
- Select New Vendor on the menu
- Enter the Vendor ID and Name
- Set Access Criteria
- Enter additional information
- Save
- Add appropriate Vendor Addresses
- Add Payment Methods using the menu option
Header Fields
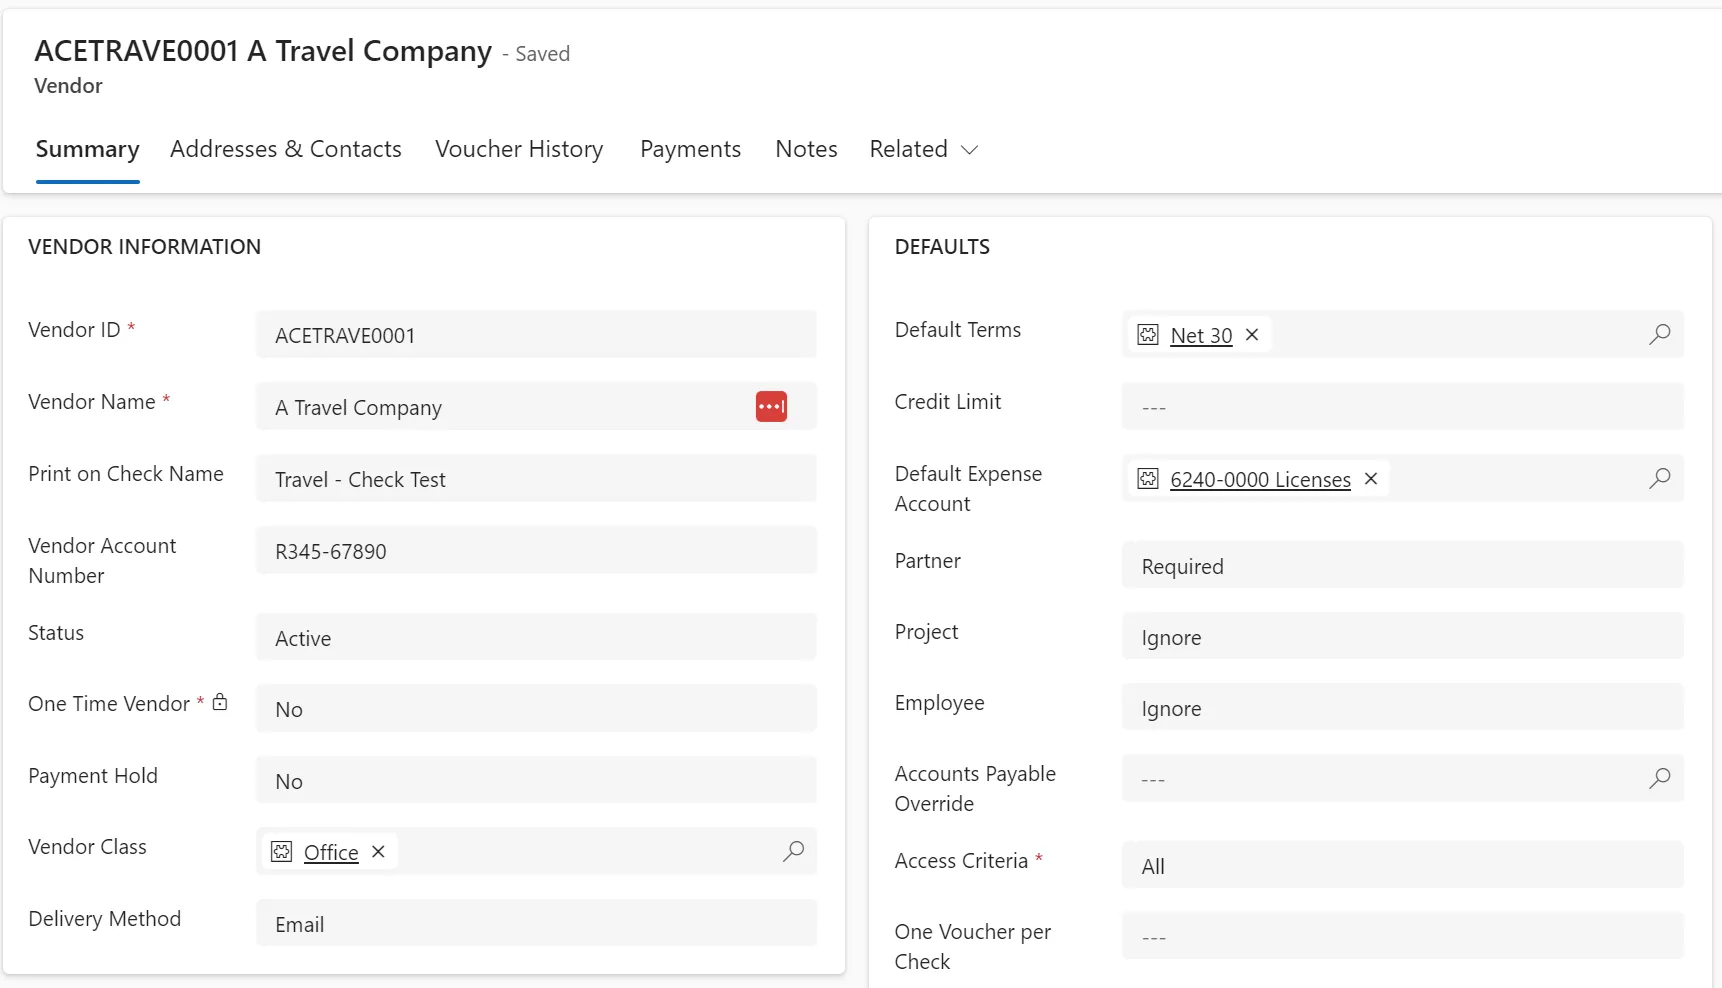
Vendor ID
Vendor ID is a code used to access the vendor. Vendor ID is alphanumeric and can be up to 100 characters. Vendor ID is required and must be unique.
Vendor Name
Vendor name is alphanumeric and can be up to 160 characters. Vendor name is required.
Print on Check Name
The name printed on a check can be different from vendor name.
The name defaults from the vendor name.
Vendor Account Number
Use the vendor account number to notate your account number with the vendor.
Status
Setting a vendor's status to hold prevents processing any vendor transactions.
One Time Vendor
A One Time Vendor is used when you do not want to create an individual vendor record and do not need to capture 1099 information. If selected a Vendor Name is not required and the Vendor address are not needed. When used on a Voucher the Vendor Name and Addresses are filled in on the Voucher.
Payment Hold
Setting payment hold to "yes" prevents automated payments from being processed.
Vendor Class
Use the vendor class to group vendors for payment processing and reporting.
During the select checks process vouchers can be added to the batch based on vendor class.
Default Terms
Select a default terms code. Change the terms code on each voucher if needed.
Credit Limit
Fill in the your credit limit with the Vendor
Default Expense Account
Select the vendor's default expense account. Change the expense account on each voucher if needed.
Dimensions
Enter the rule for each dimension set up for the entity. Set dimensions to ignore, optional or required.
See Using Dimensions
Access Criteria
Vendors can be defined to be shared by all, selected or just a single entity.

When selecting only one company, or selected companies choose the applicable entity(s) from the drop down list displayed.
Vendors are only displayed in the entity(s) selected.
See Multiple Entities
One Voucher per Check
The flag to only allow one voucher to be added to a payment starts is configured on the Vendor and is carried over to each Voucher where it can be overwritten.
When selected only one voucher will be printed on each payment. If there are 2 or more Vouchers they will be separated into individual payments.
Details and Taxes
Phone, Fax, Email & Web Site
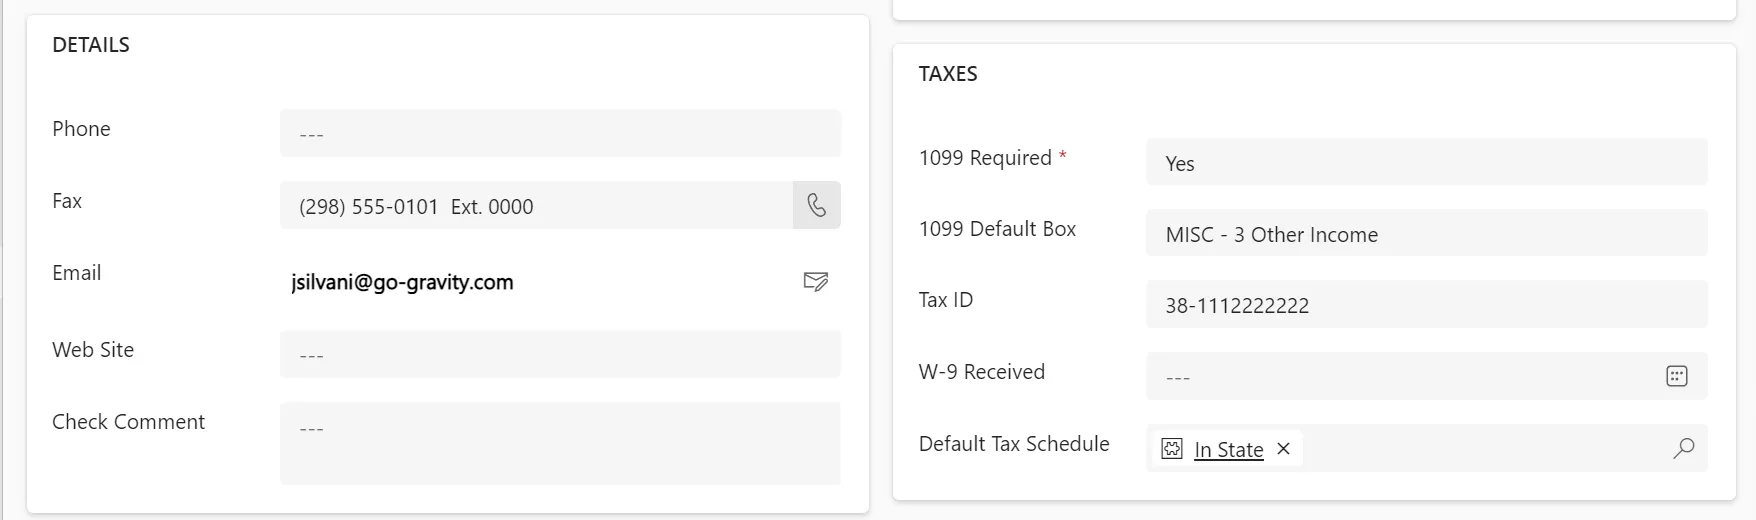
Use these optional fields for informational purposes.
1099 Required
If the vendor requires a 1099 select “yes”. When set to “yes”, the 1099 default box and tax ID become required fields.
1099 Default Box
Select the default 1099 box from the drop down list displayed. The 1099 Box can be changed on each voucher if needed.
W-9 Received
Use this field to control W-9 receipt.
Default Tax Schedule
When VAT taxes are selected the tax fields become available on the Voucher form. Select the default tax schedule from the drop down list displayed. The schedule can be changed on each voucher if needed.
Addresses
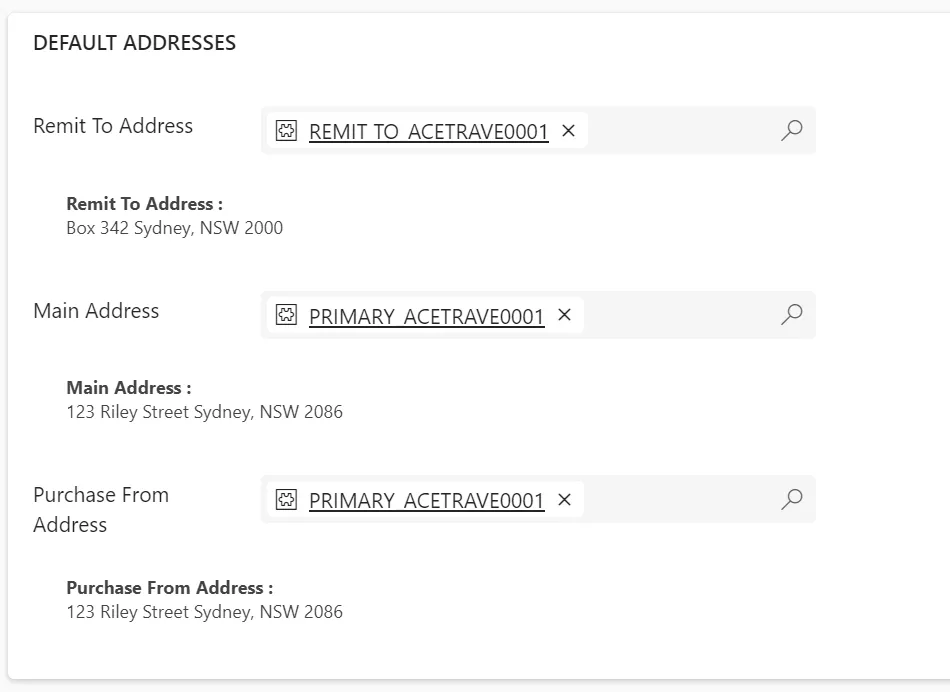
Remit To Address
Select the vendor’s remit to address. The vendor record must be saved before an address can be created.
Remit to is printed on any check printed for the vendor. The remit to can be changed on each voucher.
Main Address
Select the vendor’s main address. The vendor record must be saved before an address can be created.
Purchase From Address
Select the address used in PO's. The vendor record must be saved before an address
can be created. The purchase from address is defaulted on PO's created for the vendor.
Financial Information and Currency
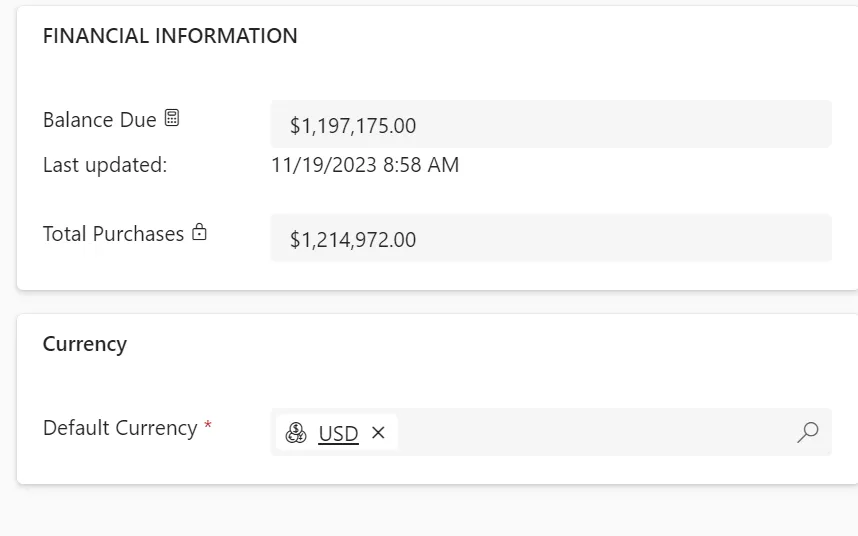
Balance Due
The total amount due to the vendor.
Total Purchases
The total vendor purchases value.
Currency
Select the default currency for the vendor. The currency can be changed on each Voucher.
Alternative Vendor Addresses
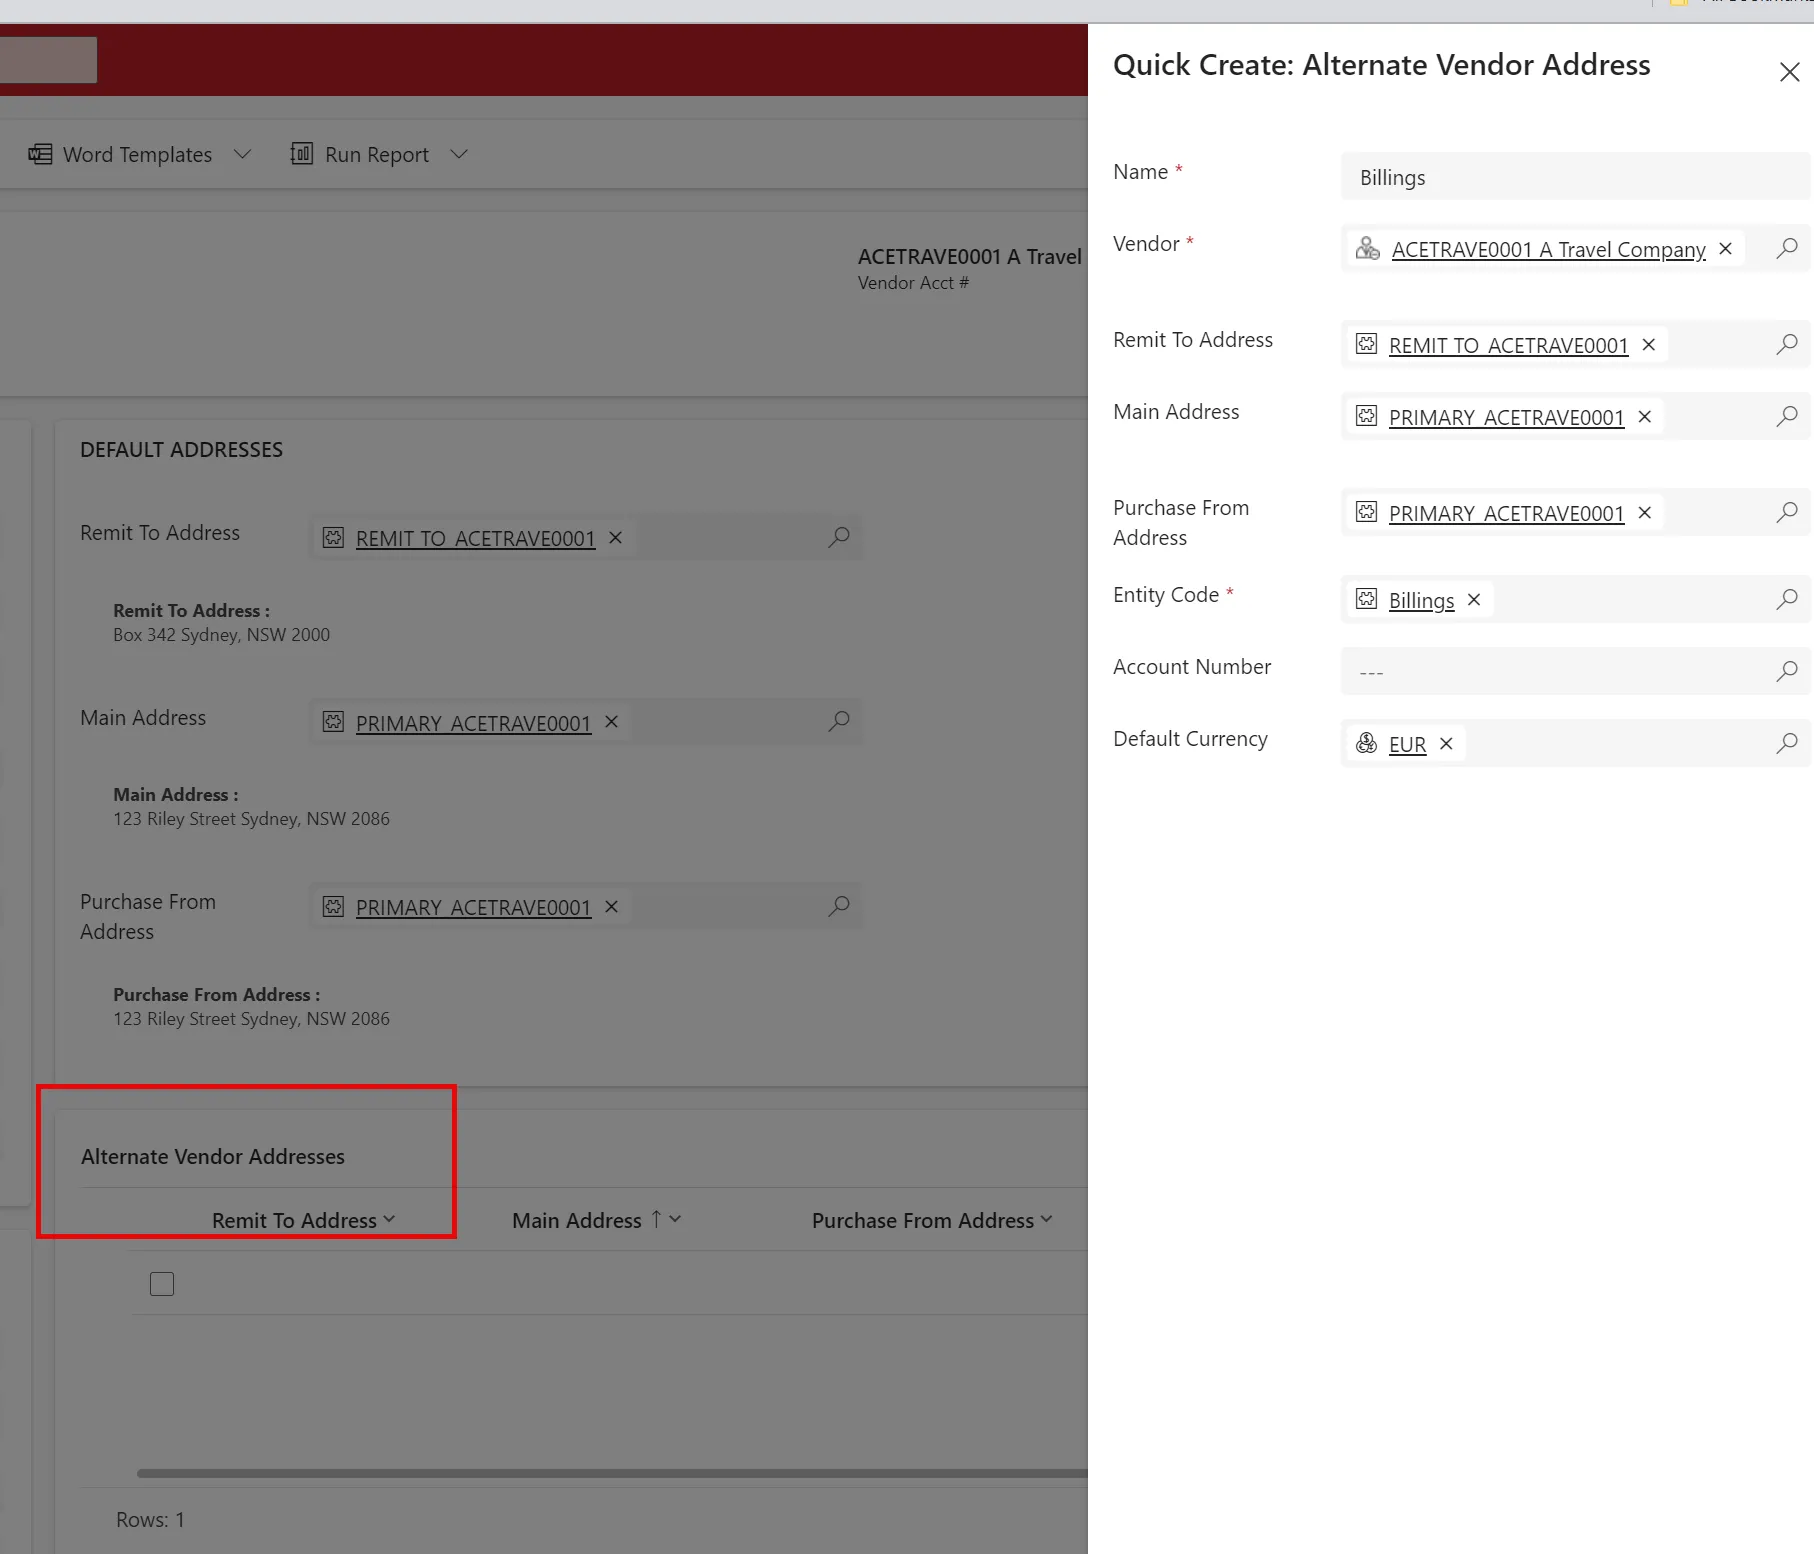
Use the Alternative Vendor Address to define Default Addresses, Default Currency and Default Account numbers for individual Entities.
Payment Methods
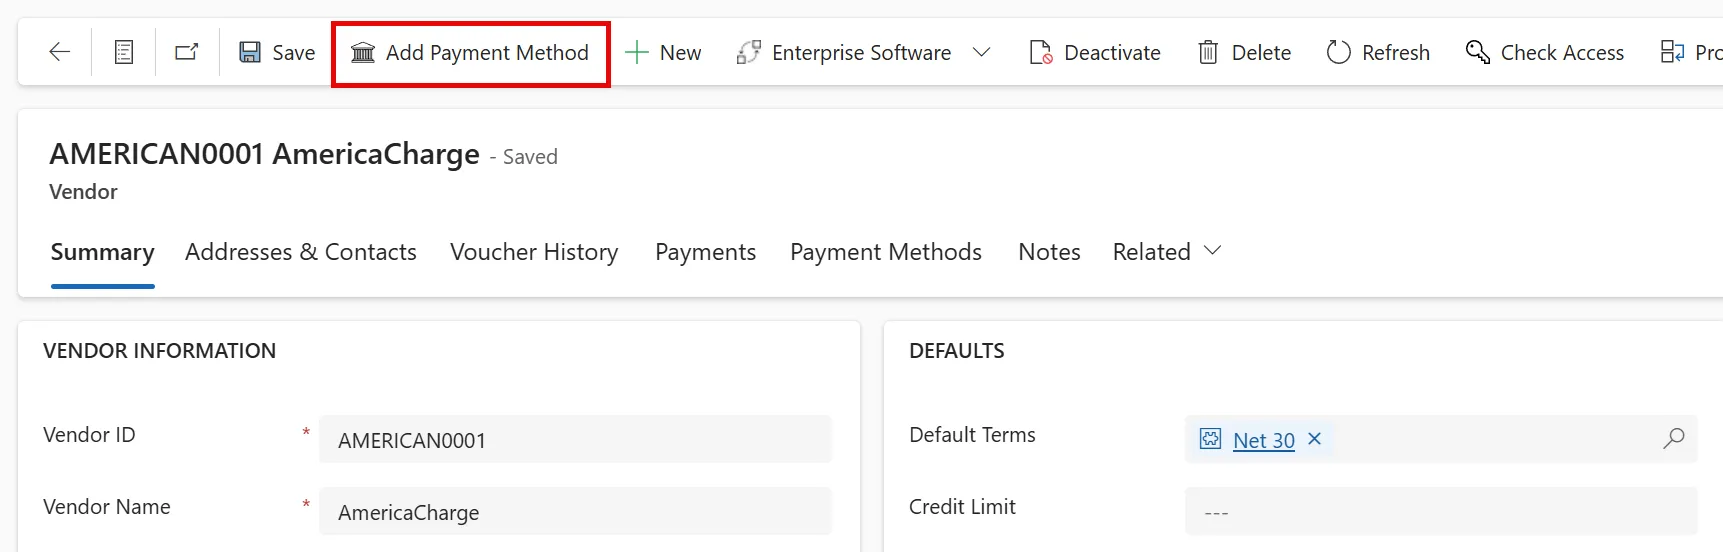
Payment methods determine how the Vendor will get paid. Select Add Payment Method from the menu. See Payment Types
Vendor Insurances
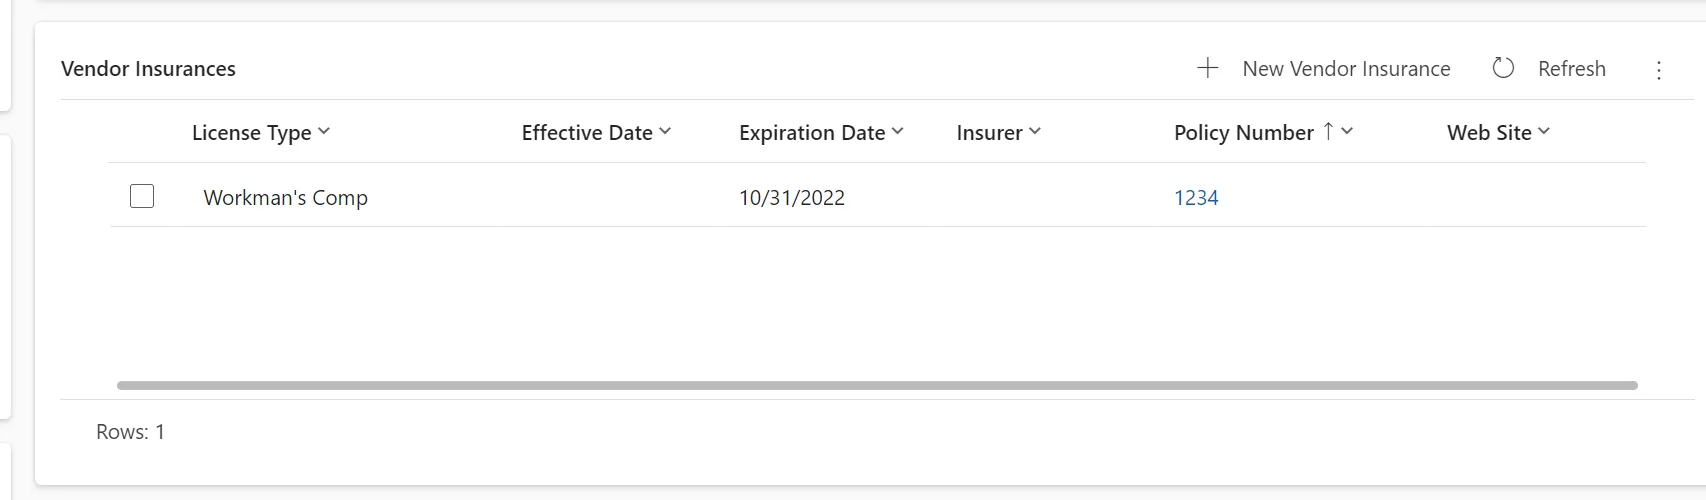
Vendor Insurances allows you track different insurance policies and their expiration dates for each Vendor, To add a new policy select the + key open the dialog to add a policy
Addresses & Contacts
Addresses Fields
To enable addresses the vendor record must be completed and saved.
Select the "+" icon above the address grid.
Name
Enter a name to identify the vendor address.
Enter an email address unique to the vendor address.
Addresses and Contacts
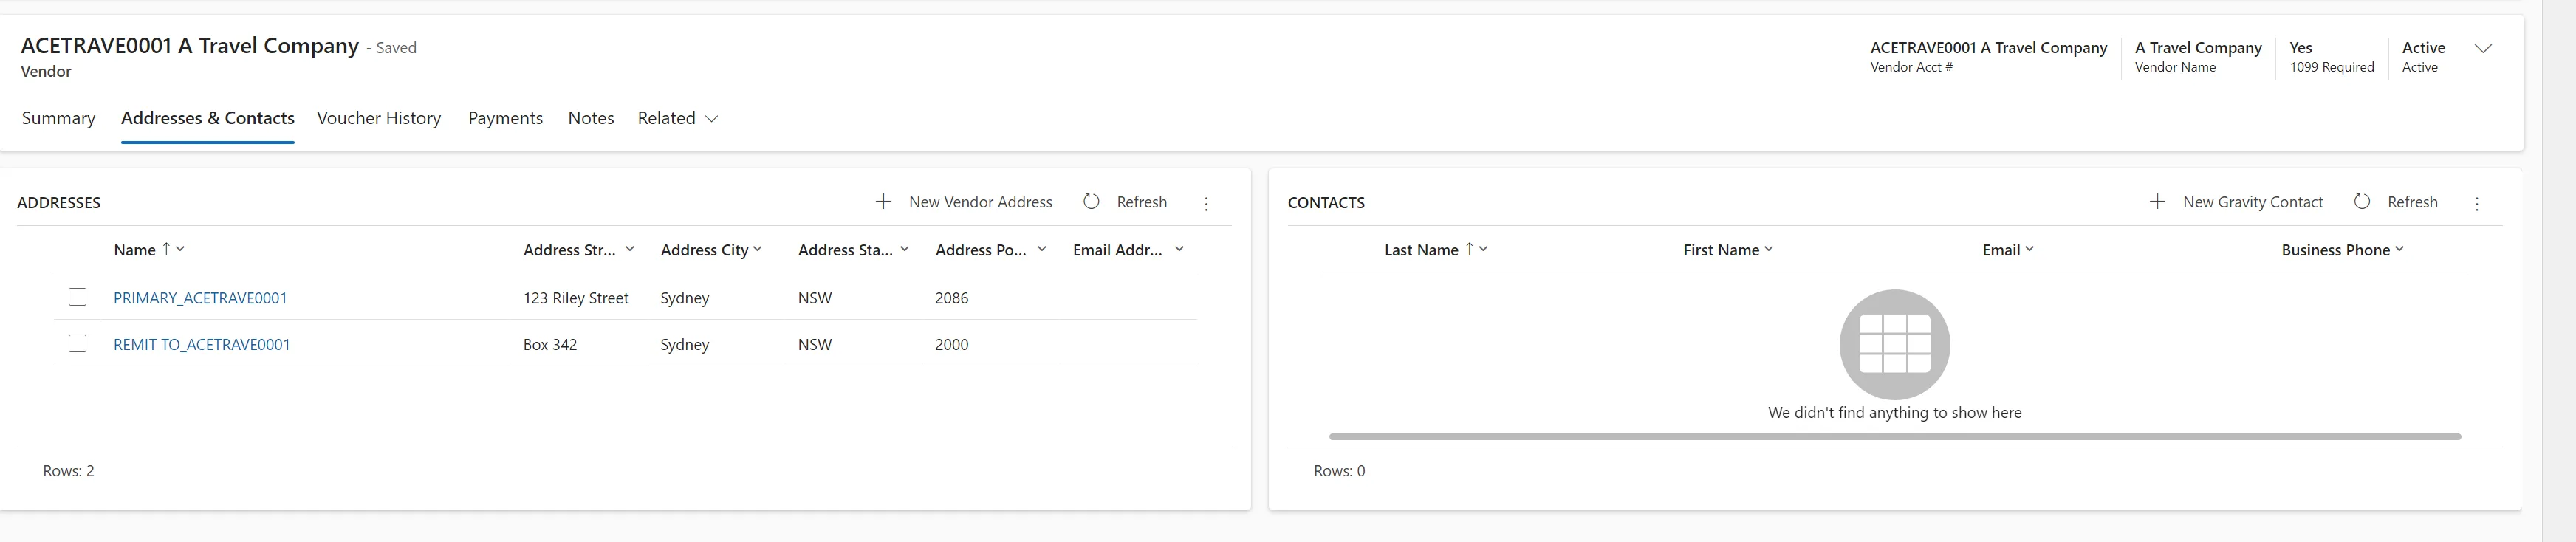
Enter address details as appropriate.
Each Gravity vendor record supports a single remit to address. However, some vendors may have multiple remit to addresses. Often this happens when there are multiple payment sites (e.g. lock boxes) based on geographic location.
When additional remit to addresses are needed for each Entity, use the alternate addresses function instead of setting up a separate vendor record for each address.
Additionally, the address is displayed in the addresses and contacts section of the vendor screen.
Contacts Fields
To enable contacts the vendor record must be completed and saved.
Select the + icon above the Contact Grid.
First & Last Name
Enter the contact’s first and last name.
Address Details
Enter address details as appropriate.
Payment Methods
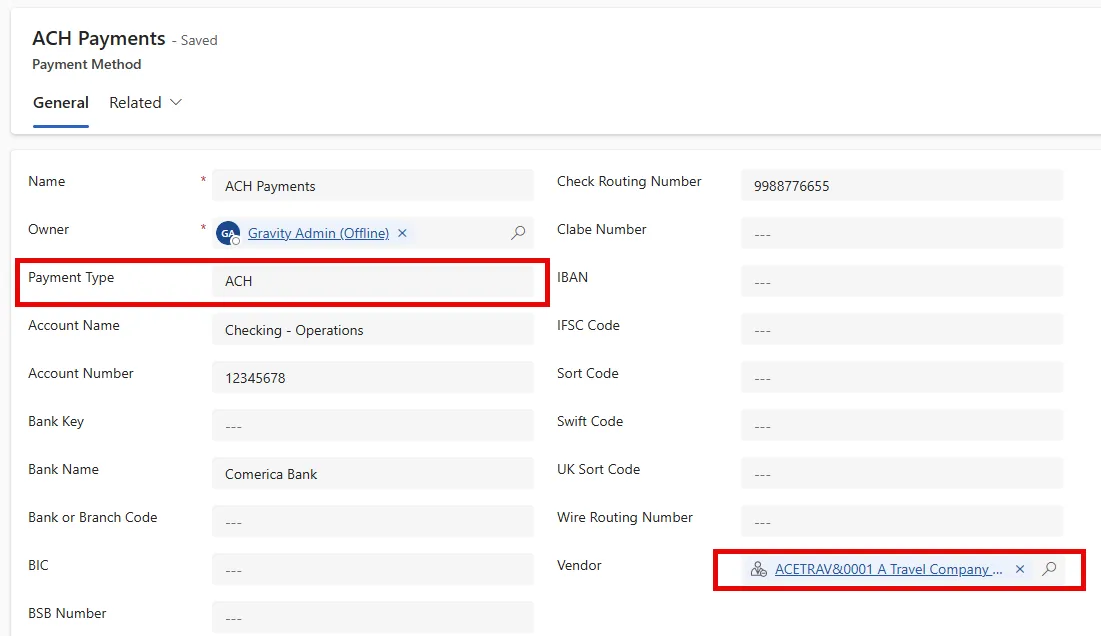
Vendor Payment Methods links the individual vendors banking information with the Payment Type where the payment transaction will be processed.
A vendor may have multiple payment methods for different processes but may only use each payment type once.
Activities and Notes
Use activities and notes to capture vendor information for future reference.
Set up and track activities such as tasks and phone calls. Enter notes and attach records as required.