Quick Bill/Check
The Quick Bill/Check form serves the purpose of simultaneously entering a Vendor bill and payment record. It provides the option to print a check or not. This form streamlines the tasks of entering a Voucher and processing a payment by consolidating them into a single screen.
Due to the combination of two separate records in the form, it is currently not feasible to save future transactions or view them in a grid format. Once the form is completed, the bill will be stored in the Vouchers section, while the associated payment will be stored in Check Maintenance.
Access select check from the Expense options.
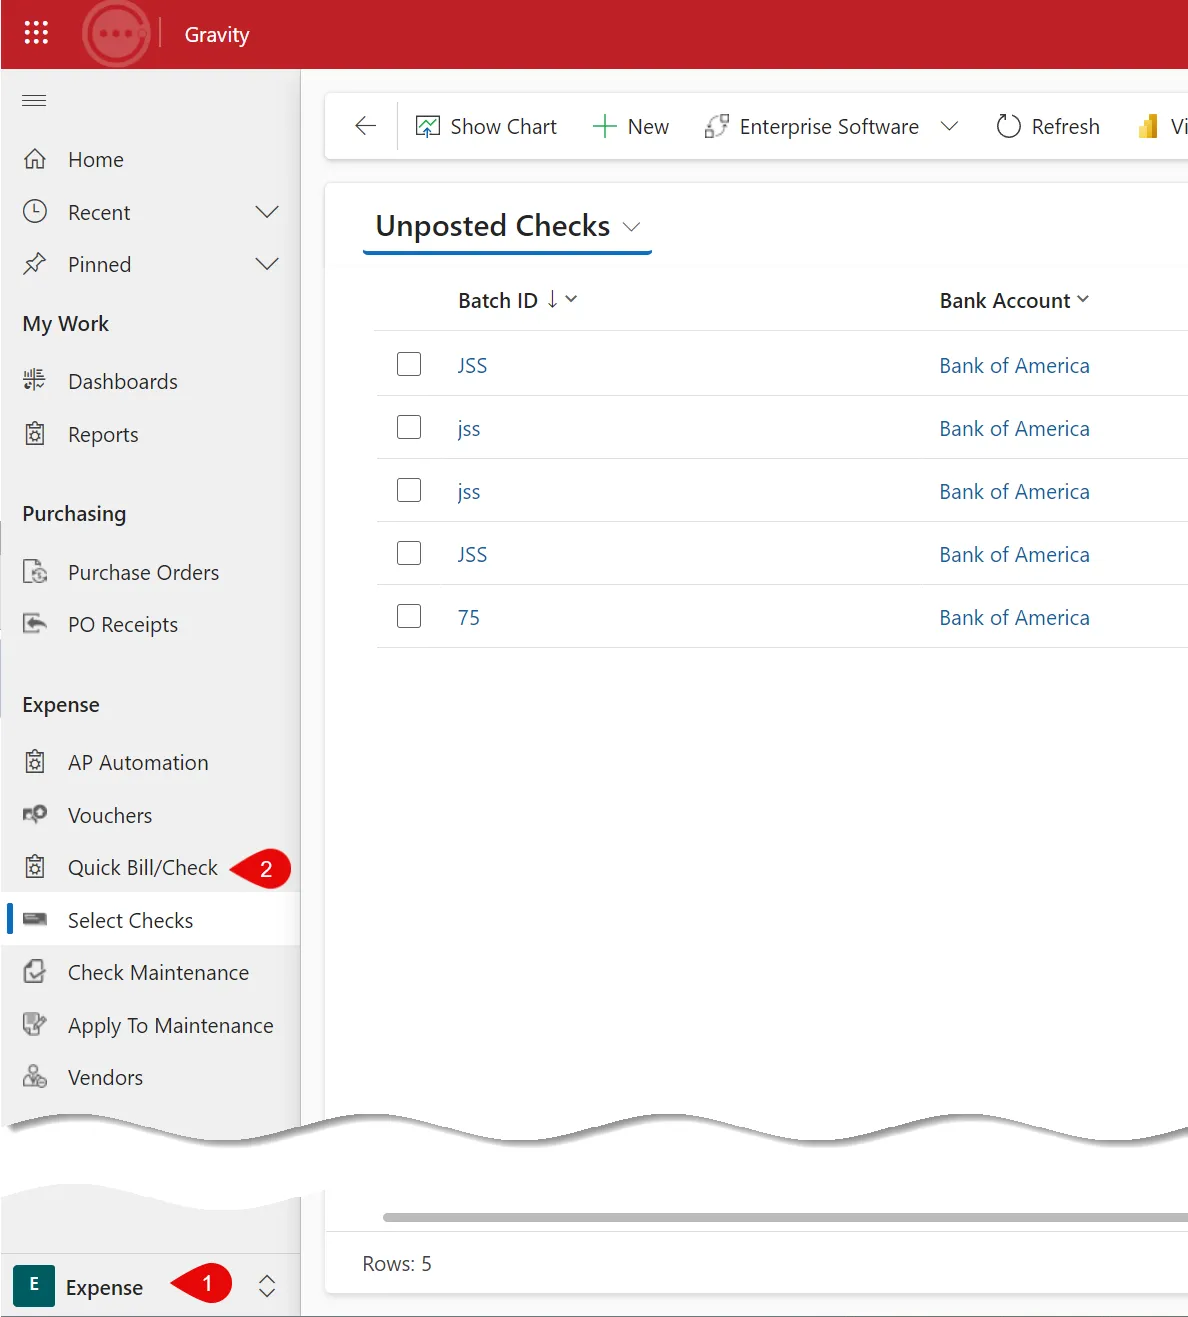
Multi Entity
Gravity supports multi-entity processing. When using multi-entity, be sure that you're processing the transaction in the correct entity.
Note:
The Quick Bill/Check form does not support the following features (if needed you should use the Voucher Entry form)
- Purchase Order matching
- Credit Memos
- Negative line items
- Recurring Bills
- Line Item Quantities and Rates
Process:
Header Fields
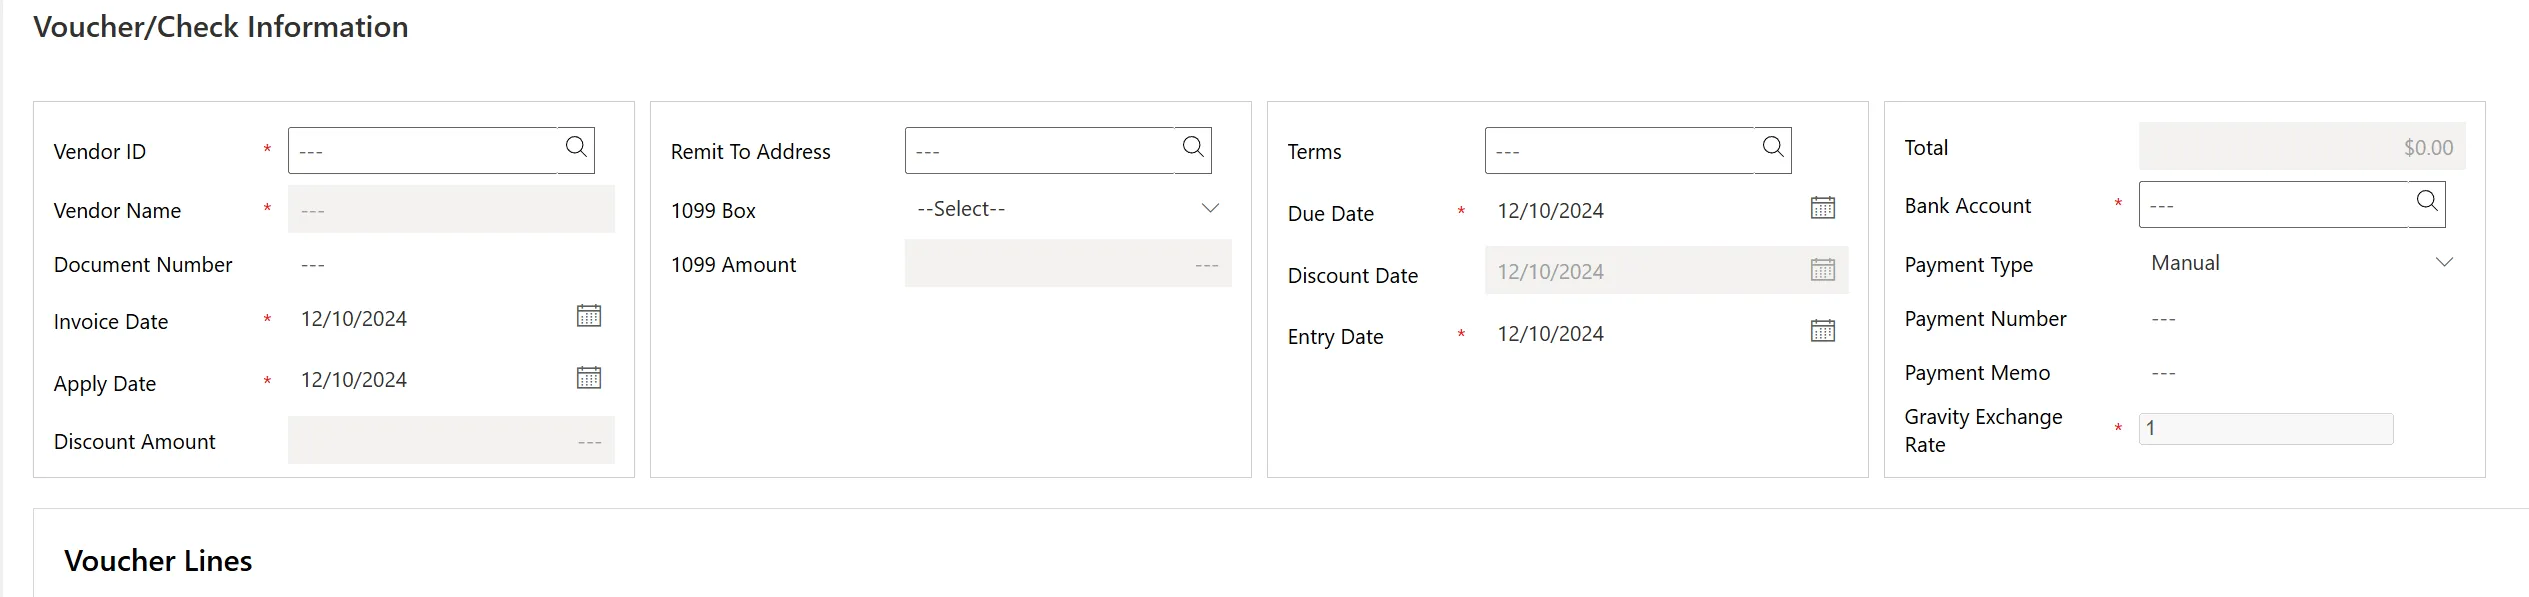
Vendor ID
Use the in-line search capability or the field's drop-down search box to select a vendor. Selecting a vendor retrieves the vendor’s defaults.
Vendor Name
The vendor name of the vendor selected.
Document Number
Enter a document number to track the voucher back to the vendor's source document. A warning is generated if the same document number is entered more than once for a vendor.
The warning helps identify if the vendor document has already been entered.
Invoice Date
Enter the vendor invoice date. This invoice date combined with the vendor's terms calculate the due date and discount date.
Apply Date
Use the apply date to determine the accounting period to which the transaction applies based on the fiscal periods set up for the company.
For example, an apply date of 4/19/2019 applies the transaction in the calendar period of April if calendar periods are selected in system set up.
With the applicable user permissions assigned, the user can apply transactions to past and future periods. Use the calendar function to navigate and select the correct period and date.
Discount Amount
The amount is calculated from the vendor terms code when applicable.
Dimensions
Use dimensions to define how transactions are categorized for unique reporting requirements. Header defined dimensions are automatically copied to line items.
Specify dimensions in the header if most or all of the line items will have the same dimension codes.
See Using Dimensions
Remit To
The remit to address defaults from the vendor record. Change on the voucher when needed.
1099 Box
The 1099 box defaults from the vendor record. Change the voucher 1099 box when required.
1099 Amount
The 1099 amount defaults from the invoice amount in the voucher header. Change the amount if required, to reflect the amount to be reported on the 1099.
Terms
Vendor terms default from the vendor record. It can be changed on each voucher. Terms codes drive the calculation of the voucher due date, discount date and discount amount.
Due Date
The due date automatically calculates from the invoice date and vendor terms combination. Change the due date if needed. The discount date can be used in helping to select checks for payment.
Discount Date
The discount date calculates automatically from the invoice date and vendor terms combination.
Entry Date
The date the voucher record was created and defaults to the header's entry date.
Bank Account
Select the bank account to be used to record the Vendor payment
Check Type
Select Manual if you do not want a check printed. Select Automatic to print a Check
Check Number
If Manual is selected for the Check Type then you can fill in the payment or check ID.
Check Memo
A memo to the payment can be entered in the Check Memo area. If you are using the Automatic Check Type to print a payment, it will be printed in the lower left corner of the payment.
Voucher/Check Information
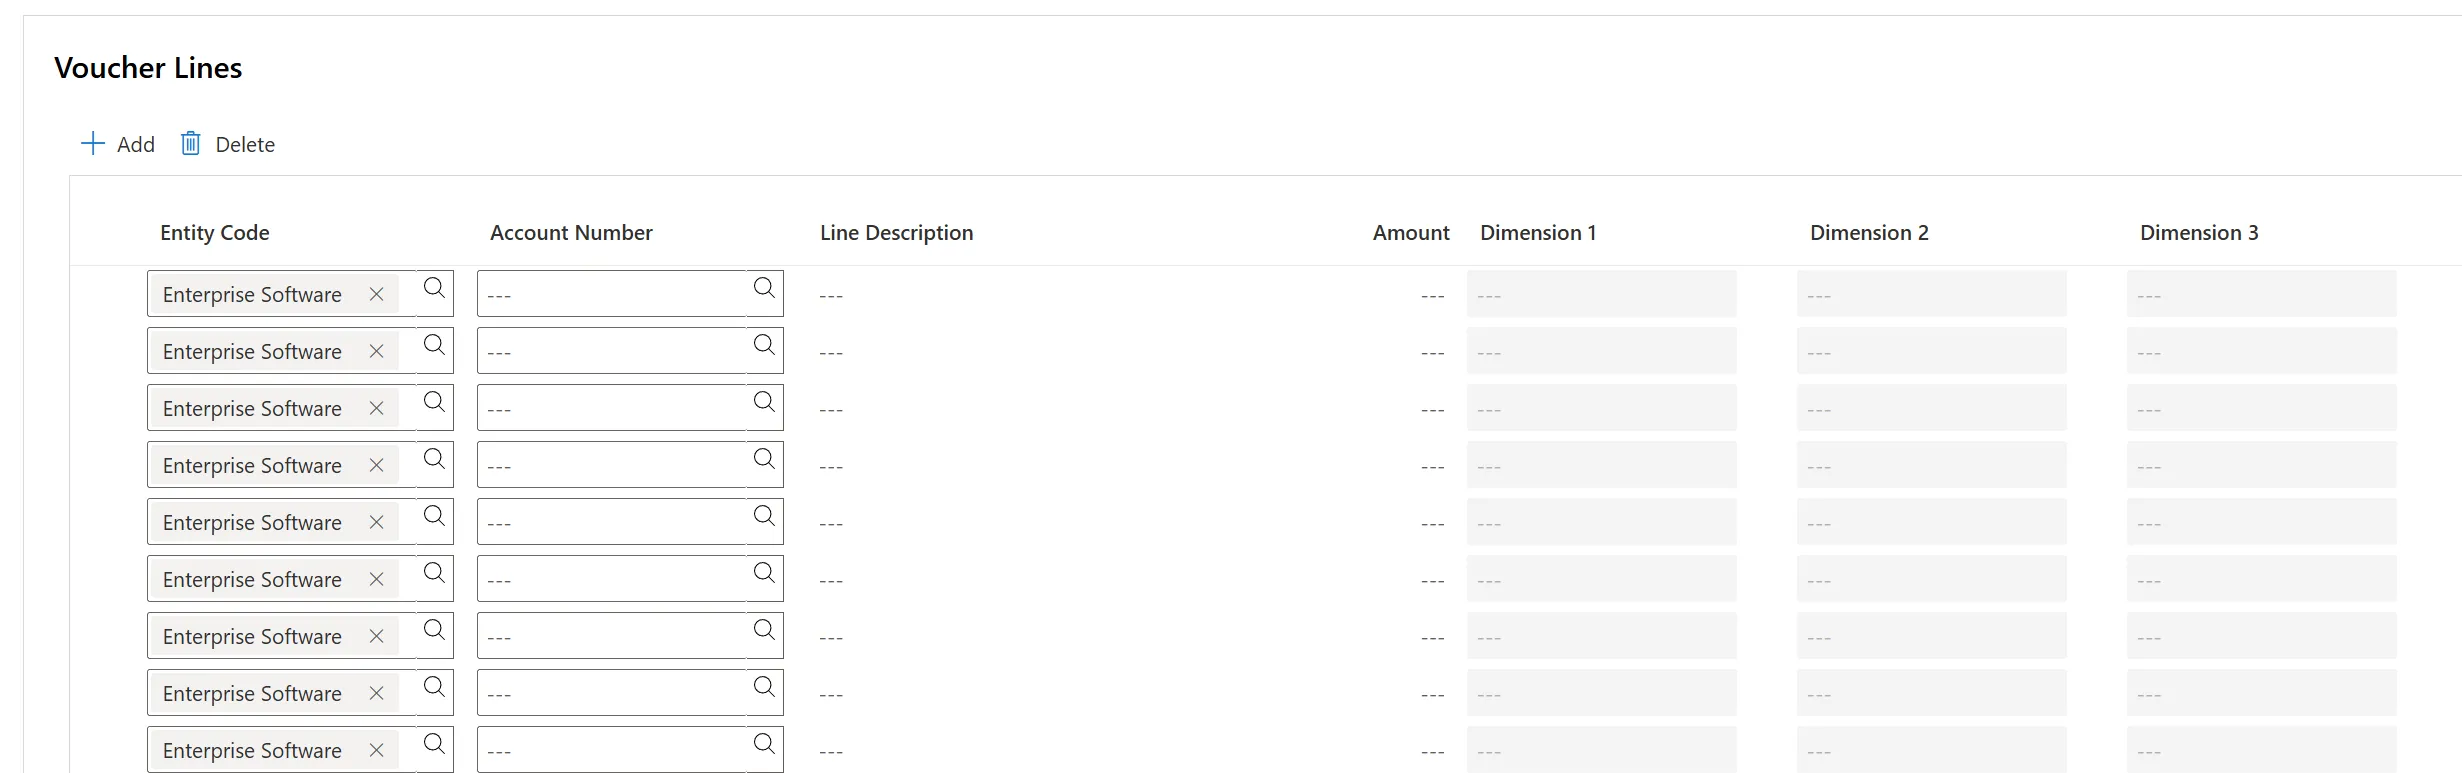
Entity Code
This field only displays if multi-entity has been enabled. Use the in-line search capability or the field's drop-down search box to select the entity code related to the entity or fund to post the line it to.
Note: The line's account number is validated against the COA for the selected entity code.
See Multiple Entities
Account Number
Use the in-line search capability or the field's drop-down search box to select a GL account number. Part of an account number or account name can be entered for fast lookup.
Line Description
Enter a description to identify the line item on reports.
Amount
The amount automatically calculates (quantity x rate). Enter an amount for the line item without a quantity and rate when needed.
Dimensions
Use dimensions to define how transactions are categorized for unique reporting requirements. Header dimensions are automatically copied to line items. Change the line item dimensions as needed.
Dimension rules determine if dimensions are required or optional for each line item.
See Using Dimensions